

7 Steps of Soldering: A Professional Guide (2025 Edition)
Table of Contents
- Introduction
- 1. Preparation & Workspace Setup
- 2. Component & PCB Cleaning
- 3. Flux Application
- 4. Heating & Wetting
- 5. Solder Application
- 6. Cooling & Inspection
- 7. Cleaning & Finishing
- Wintech's Role in Professional Electronics
- Best Practices
- Conclusion
- Summary Table
Introduction
Soldering is an essential skill in electronics manufacturing, enabling durable electrical connections on PCBs. Whether you're prototyping, doing surface-mount assembly, or full turnkey production, the process involves seven critical steps. This guide covers each stage in detail and highlights how professionals—like Wintech Electronics Manufacturing Services—ensure quality and precision in high-mix, low- to mid-volume production environments.
1. Preparation & Workspace Setup

Before soldering starts, a clean, organized workspace and the right tools set the stage for success.
Essentials:
- Proper lighting and ventilation: Use fume extraction to avoid inhaling solder flux smoke.
- Correct tools on hand: Temperature-controlled soldering iron (310–370 °C), solder wire (e.g. 60/40 rosin core), flux, tweezers, sponge or brass tip cleaner, and magnification.
- ESD protection: Work on an anti-static mat, use wrist straps to protect sensitive components.
- Organized components: Group resistors, capacitors, ICs in trays—especially crucial for Wintech’s PCBA & SMT lines.
2. Component & PCB Cleaning
Any dirt, oils, or oxidation can cause poor solder adhesion and unreliable joints.
- PCB cleanliness: Use isopropyl alcohol and lint-free wipes to remove contaminants.
- Component lead preparation: Trim leads if needed and clean oxidation with alcohol or light abrasion.
- PCB hole tidiness: Blow out drilled holes to ensure proper solder flow in through-hole assembly.
3. Flux Application
Applying flux is crucial for cleaning metal surfaces and promoting solder flow during the process.
- Rosin-core solder: Contains flux built-in for general tasks.
- Additional flux: Use paste or gel flux for SMT or if dealing with oxidized surfaces.
- Apply sparingly: A small dab is enough; excess flux can cause residue issues.
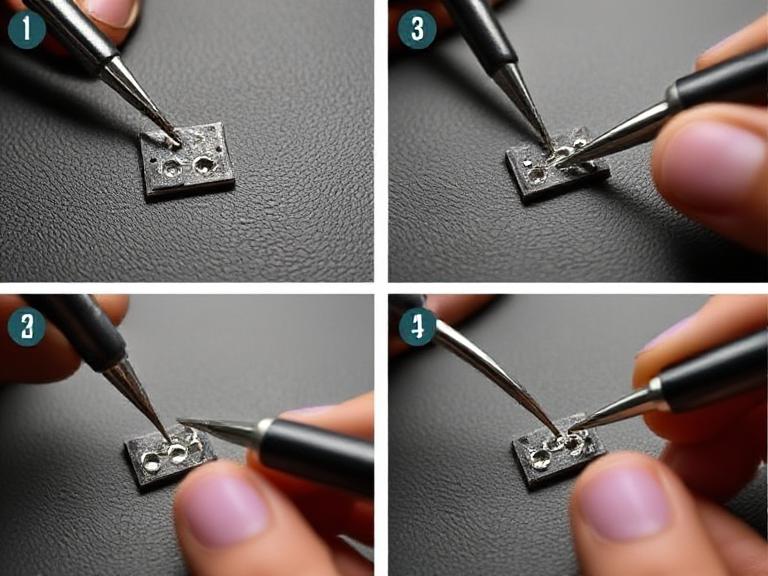
4. Heating & Wetting
Start the actual soldering by heating, ensuring solderability and joint quality.
- Preheat temperature: Warm board slowly (to ~100 °C) to avoid thermal shock.
- Tip contact: Touch soldering tip to both component and pad—heat must spread evenly to ensure adequate wetting.
- Flux action: Watch flux activate (smoke slightly), confirming surfaces are being cleaned.
5. Solder Application
Wetting the joint with solder creates a reliable, conductive connection.
- Apply solder: Feed wire solder gently to the heated area—not onto the tip—to flow around leads or pads.
- Amount control: Enough to cover pad and lead without creating blobs or bridges.
- Remove heat together: Take away iron and feed solder at the same time to avoid cold joints.
6. Cooling & Inspection
After soldering, joints must cool undisturbed to ensure solidity and reliability.
- Let joints rest: Allow 2–3 seconds of natural cooling before any movement.
- Check quality: Use magnification—joints should be shiny, volcano-shaped, with no cracks or voids.
- Reflow cold joints: Reheat with flux and apply fresh solder if dull, grainy, or cracked.
7. Cleaning & Finishing
Cleaning removes flux residues and ensures solder joint integrity over time.
- Alcohol rinse: Clean with isopropyl alcohol and brushes or lint-free wipes.
- Final inspection: Visually and electrically test for shorts, proper continuity.
- Apply conformal coat (optional): For moisture or vibration resistance in industrial or outdoor electronics, often provided by Wintech in turnkey assemblies.
Wintech's Role in Professional Electronics

Wintech offers a full spectrum of services—from PCB design and layout to SMT, PCBA, and turnkey solutions for global high-tech customers. Their approach in soldering and assembly workflows includes:
- Controlled SMT lines: Precision machines with reflow profiling for dense component placement.
- Manual wave-through-hole soldering: For mixed-technology boards, ensuring stable joints.
- Rigorous quality protocols: Solder joints are inspected by AOI, X-ray, and functional testing.
This systematic approach ensures that every soldered board meets rigorous reliability standards demanded by top-tier OEMs and across industries.
Best Practices
- Use rosin-core solder: 60/40 or 63/37 tin-lead for general work; lead-free for RoHS compliance.
- Maintain iron tips: Keep clean and tinned to ensure heat transfer.
- Temperature control: 320–350 °C for leaded; 370–400 °C for lead-free solder.
- ESD awareness: Crucial during component handling and soldering sensitive ICs.
- AOI & Testing: Final boards should pass optical inspection and any electrical functionality checks.
Conclusion
Mastering these 7 steps of soldering delivers dependable, professional-grade results. Whether you’re crafting prototypes or overseeing full production lines, following this process minimizes defects and boosts reliability. As a turnkey manufacturer, Wintech offers everything from design to high-precision soldered assemblies, leveraging best practices to meet global standards.
Summary Table
| Step | Purpose | Key Action |
|---|---|---|
| 1. Preparation | Set workspace & tools | ESD mat, iron, solder, and lighting |
| 2. Cleaning | Ensure adhesion | Alcohol-clean PCB & leads |
| 3. Flux | Promote wetting | Apply minimal flux or rosin-core solder |
| 4. Heating | Prepare pad and lead | Heat both until flux activates |
| 5. Soldering | Create joint | Feed solder wire, remove simultaneously |
| 6. Cooling | Solidify joint | Let rest; inspect shiny joint |
| 7. Cleaning | Remove residue | Alcohol wash + final test |


